






 (307) 441-5030
Table of Contents
- What You'll Need Before You Start
- Step 1: Plan Steam Generator Placement and Clearances
- Step 2: Rough-In Plumbing and Drainage
- Step 3: Meet Steam Shower Electrical Requirements
- Step 4: Apply Steam Shower Waterproofing Techniques
- Step 5: Follow Steam Shower Ventilation Best Practices
- Step 6: Install the Steam Shower Unit and Test
- Step 7: Troubleshoot Common Installation Errors
- Frequently Asked Questions
Last Updated: September 22, 2026
What You'll Need Before You Start
Steam shower installation is a job where the prep work decides everything. Get the planning right and the rest moves fast. Skip it and you'll be tearing out tile in a month.
![Kohler Invigoration 2.0 Steam Shower Generator [K-32324/25/26/27/28-NA]](https://cdn.shopify.com/s/files/1/0864/3602/0535/files/kohler-invigoration-2-5kw-steam-shower-generator-k-32324-na-sak63807-front-right-view.jpg?v=1780344050)
Here's what you need on hand before demo day:
- Steam generator sized to your enclosure volume
- Pressure relief valve and drain pan
- Vapor barrier and waterproofing membrane
- Cement backer board and tile
- GFCI breaker and correct gauge wire
- Ventilation fan rated for the room
- Silicone sealant and pipe fittings
- Temperature sensor and control interface
Tools and Materials Checklist
Gather everything before you start. A mid-job hardware run costs you a day.
- Tape measure and level
- Pipe wrench and tubing cutter
- Drill with masonry bits
- Multimeter
- Trowel and notched spreader
- Safety glasses and gloves
Permits and Code Compliance
Pull your permits first. Most areas treat a steam shower as a plumbing and electrical alteration, so both trades need sign-off. Wiring must meet local electrical code, and plumbing must meet local plumbing code. Check with your city's building department before you cut anything.
Step 1: Plan Steam Generator Placement and Clearances
Generator placement is the decision you can't undo later. Get it wrong and you'll fight heat, noise, or access problems for years.
Generator Sizing and Location
Match the generator to your enclosure's cubic volume, not its floor area. A taller ceiling needs more power. Mount the unit close to the shower to shorten the steam line, but leave the clearance the manufacturer specifies for service access.
Steam Head Installation Height and Location
Mount the steam head roughly 12 to 18 inches above the floor, away from where you stand. Never point it at a seated bather. Angling it slightly downward keeps steam moving through the room instead of blasting one spot.
Step 2: Rough-In Plumbing and Drainage
Plumbing rough-in sets the foundation. Do this stage slowly and pressure-test before you close any walls.
Water Supply Line and Pressure Relief Valve
Run a dedicated cold water supply line to the generator. Install the pressure relief valve on the unit as directed. It releases excess pressure and protects the tank.
Drain Pan and Pipe Fittings
Set the generator in a drain pan with a path to a floor drain. Use brass or copper fittings rated for hot water. Cheap fittings fail first.
Step 3: Meet Steam Shower Electrical Requirements
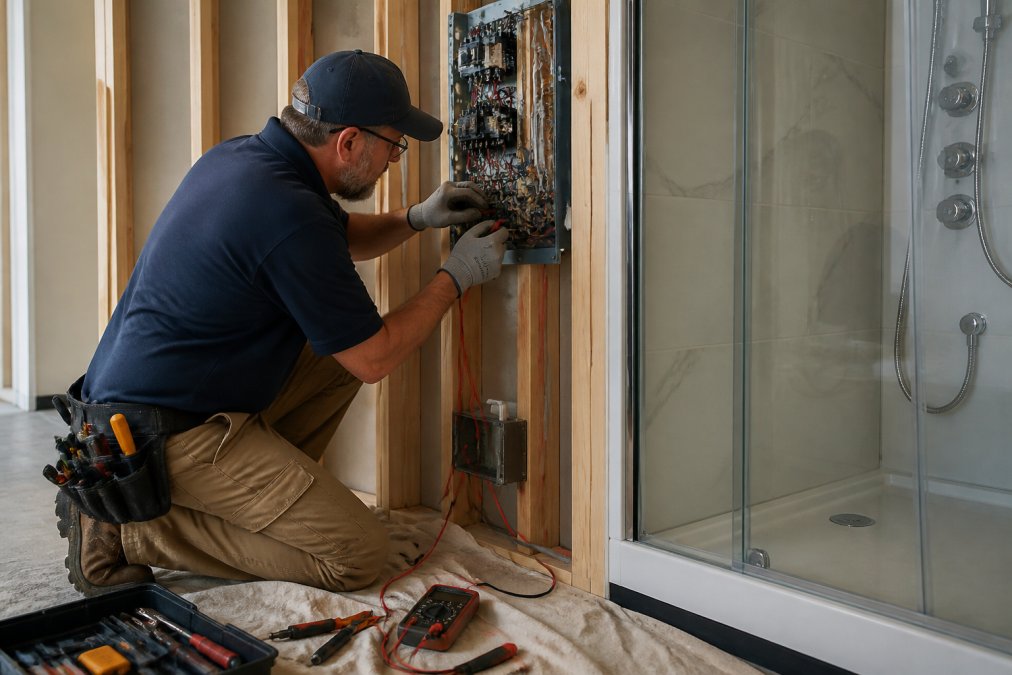
Steam shower electrical requirements are the part most homeowners underestimate. This is not a DIY circuit. A steam generator is a continuous, high-amperage load running in a wet location, and the National Electrical Code (NEC) treats it accordingly.

Voltage, Amperage, and Circuit Breaker Sizing
Most residential steam generators run on a dedicated 240-volt circuit. The nameplate on the unit lists its rated wattage and amperage, that number, not the room size, drives every downstream decision.
Here is the calculation most guides skip:
- Find the rated load. A typical residential generator draws between roughly 20 and 50 amps at 240V, depending on cubic-foot rating. The nameplate is the only number that matters.
- Apply the 80% rule. Because a steam session runs long enough to count as a continuous load, the NEC requires the circuit to be sized so the load does not exceed 80% of the breaker rating. A 30-amp load therefore needs at least a 40-amp breaker, not a 30-amp one.
- Match the wire gauge to the breaker, not the load. A 40-amp circuit needs 8 AWG copper; a 50-amp circuit needs 6 AWG copper. Undersized wire overheats inside the wall, where you cannot see it.
- Confirm the panel has capacity. Two-pole 240V breakers consume two slots. If your panel is full or already near its service limit, an electrician may need to add a subpanel before the generator can be installed.
GFCI Protection and Control Interface Wiring
The NEC requires ground-fault circuit-interrupter (GFCI) protection for receptacles and equipment in wet locations, and a steam shower enclosure qualifies. Use a two-pole GFCI breaker at the panel, not a receptacle-style GFCI, so the entire circuit, including the generator, is protected.
Permitting and Inspection for the Electrical Rough-In
Electrical work on a steam shower is almost always a permitted alteration. The rough-in must be inspected before the walls are closed, the inspector needs to see the wire gauge, the breaker, the GFCI, and the grounding path.
Step 4: Apply Steam Shower Waterproofing Techniques
Steam shower waterproofing techniques matter more here than in a normal shower. Steam pushes moisture into walls with force. In a standard shower, water hits the wall as liquid and gravity pulls it down. In a steam enclosure, water leaves the generator as vapor, fills the sealed room, and drives into any surface it can reach, including the back of the tile, the framing, and the insulation cavity.

Vapor Barrier and Insulation
Install a vapor barrier on the warm side of the wall, the side facing the shower interior, behind the backer board. The barrier's job is to stop water vapor from migrating into the wall cavity, where it can condense on cool framing and feed mold.
Kohler Invigoration 2.0 Steam Shower →
Backer Board, Tile Substrate, and Grout Sealing
Use cement backer board as your tile substrate, never drywall or greenboard. Coat it with a waterproofing membrane, a liquid-applied or sheet-applied membrane that meets the manufacturer's requirements for steam rooms. Standard shower membranes are not always rated for the higher vapor drive of a steam enclosure; check the product data sheet.
A steam enclosure needs both a vapor barrier and a waterproofing membrane. They do different jobs, and you need both. The vapor barrier stops vapor from entering the wall cavity; the waterproofing membrane stops liquid water from reaching the substrate. Skipping either one is the most common cause of hidden moisture damage behind finished tile.
Penetrations, Corners, and the Ceiling
The places leaks start are predictable: the steam head collar, the control interface cutout, the shower valve, the ceiling-to-wall joint, and every inside corner. Treat each one as a detail, not an afterthought.
- Steam head and control penetrations: Seal the collar and the cutout with silicone rated for wet locations, and back the penetration with the same membrane used on the field of the wall.
- Inside corners: Use pre-formed corner pieces or membrane tape embedded in the membrane, not a bead of caulk alone.
- Ceiling: The ceiling sees the most condensation. Membrane it the same way you membrane the walls, and slope it slightly toward the drain so condensate runs off instead of dripping.
- Door and enclosure joints: Seal with silicone at every fixed joint, and rely on the door gasket, not caulk, for the moving joint.
Testing the Waterproofing Before You Tile
Before tile goes up, flood-test the pan and inspect the membrane for gaps, pinholes, and unsealed seams. A common pattern is a membrane that looks continuous but has a pinhole at a fastener head. Once tile is on, finding that pinhole means demolition. Test first, tile second.
Step 5: Follow Steam Shower Ventilation Best Practices
Steam shower ventilation best practices keep moisture out of the rest of your home. Without them, you get mold in the ceiling above the bathroom.
Ventilation Fan Sizing and Placement
Size the ventilation fan to the room's volume and mount it high, where steam collects. Run it during and after every session.
Ceiling Slope and Enclosure Sealing
Slope the ceiling slightly toward the drain so condensation runs off instead of dripping on you. Seal the enclosure with silicone sealant at every joint. Double-check the door gasket.
Step 6: Install the Steam Shower Unit and Test
Final assembly is quick if the rough-in was right. Test everything before you call it done.
Mounting Bracket and Silicone Sealant
Secure the generator with its mounting bracket. Apply silicone sealant around penetrations and the steam head collar. Let it cure fully.
Temperature Sensor and Control Interface Setup
Mount the temperature sensor away from the steam head so it reads room temperature, not the steam jet. Program the control interface, then run a full cycle and watch for leaks.
Step 7: Troubleshoot Common Installation Errors
Most problems show up in the first week. Here's how to catch them fast.
| Problem | Likely Cause | Fix |
|---|---|---|
| Breaker trips mid-session | Undersized circuit or wire | Recalculate load, upsize wire and breaker |
| Steam feels weak | Generator undersized for volume | Verify cubic-foot rating |
| Water stains on ceiling | Missing or failed vapor barrier | Open wall, reinstall barrier |
| Musty smell | Poor ventilation | Upsize or reposition the fan |
| Unit shuts off early | Normal auto shut-off cycle | Check the timer setting |
Electrical Load Calculation Mistakes
The most common error is adding a steam generator to an existing circuit. Steam generators need their own dedicated circuit. Calculate the full load, then size the breaker and wire to match.
Water Leaks and Vapor Barrier Failures
Leaks usually trace to an unsealed penetration or a vapor barrier with gaps. Check the steam head collar and every pipe opening. Reseal with silicone and retest.
Descale the generator on the schedule your manual specifies. Scale buildup is the top cause of reduced steam output over time.
Frequently Asked Questions
What are the downsides of installing a steam shower?
The main downsides are high upfront cost, complex installation, and ongoing maintenance. Steam shower generators like the Kohler Invigoration 2.0 start around $3,099.97, and you may need to hire an electrician and plumber. Moisture damage is a real risk if waterproofing is done poorly. You'll also need to descale the generator regularly, especially in hard water areas, and ventilation must be adequate to prevent mold.
Can I install a steam shower in an existing shower?
Yes, but it requires significant modification. You'll need to add a vapor barrier, waterproofing membrane, and often a new backer board. The ceiling may need a slope to prevent condensation drips. Electrical circuits must be upgraded to handle the generator's load, and a dedicated GFCI circuit is required. A plumber and electrician are usually needed unless you're experienced with both trades.
What electrical requirements are needed for a home steam shower?
Steam shower electrical requirements include a dedicated circuit, typically 240V, with amperage based on generator size. GFCI protection is mandatory. A licensed electrician should perform a load calculation and pull the proper permit. Wiring must be sized correctly for voltage and amperage to prevent overheating or tripping.
How do you ensure proper ventilation in a steam shower?
Install a ventilation fan rated for the bathroom's cubic footage, ideally with a humidity sensor. Place the fan near the steam shower but outside the enclosure. The ceiling inside the shower should slope slightly toward the drain to prevent drips. After each use, run the fan for 15-20 minutes to remove excess moisture. Also seal the enclosure properly and insulate exterior walls to reduce condensation.