






 (307) 441-5030
Table of Contents
- What You'll Need Before You Install a Home Steam Shower
- Step 1: Plan the Enclosure, Ceiling Height, and Slope
- Step 2: Steam Shower Generator Sizing Guide
- Step 3: Steam Shower Electrical Requirements and Rough-In
- Step 4: Waterproofing, Tiling, and Material Compatibility
- Step 5: Prefabricated Kits vs. Custom Builds for Retrofits
- Common Installation Mistakes and Troubleshooting
- Cost to Install a Home Steam Shower and Operating Costs
- Frequently Asked Questions
Last Updated: September 29, 2026
What You'll Need Before You Install a Home Steam Shower
When you install home steam shower equipment, a daily rinse turns into a spa session, but the install is closer to a small remodel than a weekend swap. Gather the right tools and check local rules first.

Tools and Materials Checklist
- Tape measure and 4-foot level
- Stud finder and drill
- Tile saw and notched trowel
- Steam generator and control interface
- Copper or PEX water supply line
- Drain pan and pressure relief valve
- Vapor barrier and thermal insulation
- Tile backer board and waterproofing membrane
- Silicone sealant and grout
- Tempered glass panels and door sweep
- Ventilation fan
Permits, Codes, and Pro vs. DIY
Steam showers need a permit in most areas because they involve new plumbing and a dedicated circuit. Check with your local building department first. Electrical work must meet the National Electrical Code, and NFPA 70, National Electrical Code covers the GFCI and circuit rules that apply in wet zones.
Step 1: Plan the Enclosure, Ceiling Height, and Slope
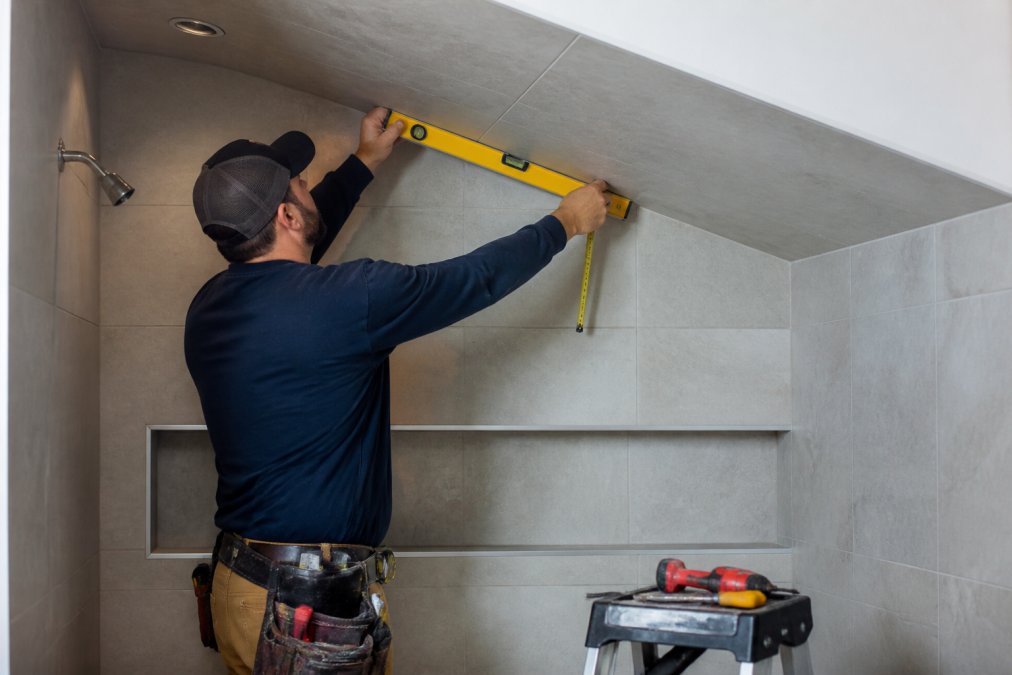
The enclosure sets the whole project: it must be sealed tight and sloped so condensation runs back to the drain.
Vapor Proofing and Insulation
A vapor barrier keeps moisture out of your walls. Without it, steam seeps into framing and grows mold. Install a foil-faced vapor barrier behind the tile backer board, and seal every seam.
- Vapor barrier on all walls and ceiling
- Thermal insulation behind the barrier
- Sealed seams at every joint
- Slope toward the drain
Step 2: Steam Shower Generator Sizing Guide
Generator size decides how fast your shower heats and how well it holds steam. Too small and you'll wait; too big and you'll pay for power you don't need.
| Enclosure Volume | Wall Type | Suggested Generator |
|---|---|---|
| Up to 100 cu ft | Tile | Small unit |
| 100-250 cu ft | Tile or glass | Mid-size unit |
| 250-400 cu ft | Stone or glass | Large unit |
| 400+ cu ft | Any | Oversized unit |
Placement and Steam Head Positioning
Mount the generator close to the enclosure to limit heat loss in the steam line, in a spot you can reach for de-scaling and service. Never bury it behind a sealed wall.
- Generator within reach for service
- Steam head 12-18 inches off the floor
- Head aimed away from seating
- Short steam line to cut heat loss
Step 3: Steam Shower Electrical Requirements and Rough-In
Steam shower electrical requirements start with a dedicated circuit. The generator pulls a heavy load and cannot share a circuit with lights or outlets.
- Dedicated circuit for the generator
- GFCI protection on the line
- Control interface outside the enclosure
- Correct wire gauge for the electrical load
Plumbing Rough-In and Drainage
Run the water supply line to the generator and a drain line from the enclosure. The drain pan and pressure relief valve protect against overflow and pressure buildup, and the floor must slope toward the drain.
Step 4: Waterproofing, Tiling, and Material Compatibility
Waterproofing decides whether the shower lasts. Material choice decides whether the finish still looks right after a year of daily steam. Both have to be right before the first tile goes up.
The Waterproofing Stack, Layer by Layer
Steam vapor is driven by heat, so it pushes through materials that would stop liquid water. The assembly has to stop vapor, not just drips.
From the studs outward:
- Thermal insulation between the studs, on all steam-facing walls and the ceiling.
- Foil-faced vapor barrier over the insulation, with seams overlapped and sealed with foil tape. This is the vapor stop.
- Tile backer board rated for wet areas, fastened over the vapor barrier.
- Liquid-applied or sheet waterproofing membrane over the backer board. This is the liquid-water stop.
- Thinset and tile over the membrane.
- Grout and sealant at the finish layer.
Which Tile Handles Steam Best
Not all tile behaves the same under repeated heat and moisture cycling.
- Porcelain. Low porosity, dense, and stable under heat cycling. The safest default for steam showers. Through-body porcelain holds up even if a chip exposes the interior.
- Ceramic. Fired clay with a glaze. The body is more porous than porcelain, so it relies on the glaze and a fully sealed installation. Fine for walls, less ideal for floors and benches.
- Natural stone (marble, travertine, limestone). Porous and sensitive to acids and to moisture. Requires sealing and re-sealing, and some stones etch or discolor under steam. Higher maintenance.
- Granite and slate. Denser than marble, but still require sealing and careful grout selection. Slate can flake along its natural cleavage under heat cycling.
- Glass tile. Non-porous and stable, but the grout lines between small glass tiles are the weak point. Use an epoxy grout.
Grout and Sealant Choices
Grout is where most steam shower finishes fail first.
- Cementitious grout. Standard, inexpensive, and porous. Needs sealing and re-sealing. Not the best choice for a steam shower.
- Epoxy grout. Non-porous, stain-resistant, and stable under heat. The better choice for steam showers, especially with glass or natural stone.
- Silicone sealant. Use at every change of plane, corners, floor-to-wall joints, and around the steam head and controls. Grout cracks at movement joints; silicone flexes.
Material Compatibility Rules of Thumb
- Match the tile to the membrane. Some liquid membranes require a specific thinset; check the membrane manufacturer's instructions.
- Do not mix natural stone with acidic cleaners. Steam plus acid etches marble and travertine.
- Seal porous stone and cementitious grout before first use, and re-seal on the manufacturer's schedule.
- Use epoxy grout with glass tile and with any stone that stains.
- Keep a spare box of tile. Steam showers are hard to match later if a tile is discontinued.
Sealing, Ventilation, and Door Sweeps
Seal every seam, corner, and penetration. Steam finds the smallest gap. A door sweep on the bottom of the glass door keeps steam from escaping into the room.
Step 5: Prefabricated Kits vs. Custom Builds for Retrofits
Most guides assume you are framing a new bathroom. If you already have a standard shower, you are converting an existing wet zone into a sealed steam room, and the enclosure you already own usually decides which path you take.
Maya Bath Luxury Roma Comfort Luxury →
Can Your Existing Shower Be Converted?
Measure the interior of the existing shower, width, depth, and ceiling height, and check three things:
- Ceiling height. A steam ceiling works best at 7 to 8 feet. If your existing ceiling is 9 feet or higher, you either lower it with a dropped soffit or accept a larger generator and longer heat-up.
- Enclosure tightness. A standard shower door with a half-inch gap at the bottom and open sides will not hold steam. You need a door sweep, sealed side panels, and a fixed transom or full-height glass.
- Drain capacity. Steam sessions produce more condensation than a normal shower. A 2-inch drain line is standard; a 1.5-inch line in an older home may need upsizing.
Retrofit Path A: Prefabricated Kit
A prefabricated steam shower kit bundles the enclosure, generator, steam head, and control into one matched package. For retrofits, it's the fastest path because the parts are already sized to each other and the enclosure is built to seal.
What to expect:
- The kit footprint must match your existing rough opening, or you reframe the opening to fit the kit.
- The generator still needs a dedicated circuit and a water supply line run to it.
- You still need a vapor barrier and waterproofing behind the kit panels if the kit does not include a sealed shell.
Retrofit Path B: Custom Build in Place
A custom build keeps your existing footprint and tile design, drain location, framing, and door opening, then adds the steam system inside the existing shell.
The work sequence is different from new construction:
- Strip the existing tile and backer board down to the studs on all steam-facing walls and the ceiling.
- Add thermal insulation between the studs, then a foil-faced vapor barrier over it, sealed at every seam and penetration.
- Install new backer board rated for wet areas over the vapor barrier.
- Run the steam line and electrical through the wall before the backer board closes up.
- Waterproof, tile, and seal the new surfaces.
- Replace the door with a sealed steam-rated door and add a sweep.
Retrofit Path C: Freestanding or Walk-In Unit
A freestanding or walk-in steam unit drops into an existing bathroom without a teardown, arriving as a sealed shell with the generator, controls, and often hydrotherapy jets already installed.
Trade-offs to weigh:
- Floor space. These units need a clear footprint, so a small bathroom may not fit one.
- Drain and water access. You still need a drain connection and a water supply, which may mean opening the floor or wall.
- Electrical. The unit still needs its own circuit and GFCI protection.
| Option | Best For | Trade-Off |
|---|---|---|
| Prefabricated kit | Standard-size retrofits, faster install | Less design freedom |
| Custom build | Keeping existing layout and tile | Higher cost, longer timeline |
| Freestanding unit | Rentals, limited space, no teardown | Needs floor space and drain access |
What Changes When You Retrofit
Three things separate a retrofit from a new build:
- You inherit the drain location. The floor slope has to work with the existing drain, not the other way around.
- You inherit the ceiling. If it is too high, you lower it or upsize the generator.
- You inherit the door opening. A standard door will not seal; budget for a steam-rated door and sweep.
Get those three right and the rest of the install follows the same steps as a new build.
Common Installation Mistakes and Troubleshooting
Most problems trace back to a few repeat errors. Fix them before the walls close to avoid costly repairs later.
- No vapor barrier: moisture rots framing and grows mold
- Undersized generator: long heat-up times and weak steam
- Bad slope: water pools instead of draining
- Missing GFCI: a shock risk in a wet zone
- No door sweep: steam escapes and the room never fills
- Unsealed grout: stains and moisture creep into the tile
Cost to Install a Home Steam Shower and Operating Costs
The cost to install home steam shower systems splits into the unit, labor, and running costs. A prefabricated kit is cheapest because it bundles the parts; a custom build adds design and labor.
- Unit cost: prefabricated kit vs. custom build
- Labor: plumbing, electrical, tiling
- Operating: generator power and fan use
- Savings: insulation and a tight seal
Frequently Asked Questions
Can I install a steam shower in an existing shower?
Yes, but the enclosure must be sealed to hold steam. You will need a vapor barrier behind the tile, a sloped ceiling to stop condensation drips, and a door with a sweep. If the existing shower is open or has a standard-height ceiling, a prefabricated steam shower kit is often faster than rebuilding the stall. Always confirm the wall cavity can fit the steam generator and that a dedicated circuit can reach the unit.
What are the electrical requirements for a home steam generator?
Most residential steam generators need a dedicated 240-volt circuit sized to the unit's wattage, plus GFCI protection and a nearby disconnect. A 4,000W generator like the one in the Maya Bath Siena typically draws around 17 amps, so a 20-amp circuit is common, but larger units may need 30 amps or more. Check the nameplate, run the circuit before tiling, and have a licensed electrician make the final connection.
Does a plumber or electrician install a steam shower unit?
Both trades are usually involved. A plumber ties the steam generator into the cold water supply, routes the steam line to the steam head, and confirms the drain pan and pressure relief valve are correct. An electrician runs the dedicated circuit, installs GFCI protection, and wires the control interface. Many homeowners handle framing, insulation, and tile themselves, then bring in licensed pros for the wet and electrical connections to stay code-compliant.
Is installing a steam shower worth it?
It depends on how often you will use it. A freestanding unit like the Maya Bath Valencia at $6,999 delivers steam, chromotherapy, and hydrotherapy without a full remodel, while a custom build adds waterproofing, electrical, and tile costs on top. If daily recovery, stress reduction, or chronic pain management is your goal, the per-use cost drops fast over several years. Logic Health's 30-day return policy lets you test that fit.
Steam shower installation rewards planning over speed. Get the enclosure, vapor barrier, and electrical rough-in right, and the finish work goes smoothly. Logic Health makes that easier with all-in-one steam shower units that bundle the generator, controls, and hydrotherapy features, plus free shipping on orders over $200, a 30-day return policy, and 24/7 support. Get started with Logic Health and turn your bathroom into a working steam spa.